Display calibration – basic setting
Pre-calibration of the display for the final LightSpace CMS 3D LUT calibration.
Unlike alternative calibration systems, very little effort is required to set up a display for LightSpace CMS LUT-based calibration.
COMMISSIONING OF THE DISPLAY
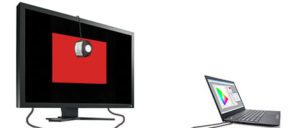
The following steps -should- be followed to get the most out of any final display calibration. If these steps are not followed correctly, a final calibration cannot be guaranteed. If anything is not fully understood, STOP until you have thoroughly investigated and understood the problem before beginning calibration.
The key is to use the minimum number of adjustment options within the display, including not using or setting to “off” built-in calibration features such as “THX/ISF” settings and controls, and setting the display range to “wide” mode if there is an option (wide color space mode usually means using the maximum color space/gamut available for that display). The reason for this is that such built-in controls can distort the color linearity of the underlying display (e.g. RGB separation), resulting in distorted colors and cross-coupling errors, and making later accurate calibration almost impossible.
PROBLEME MIT DEN DISPLAYS “OUT OF THE BOX”.
One of the very annoying realities of display calibration is that home TVs are often much harder to calibrate than professional monitors, due to the use of poor image processing electronics and the implementation of completely unnecessary “image enhancement” features that all need to be disabled.
As mentioned earlier, it is critical here to use the minimum number of adjustment options within the display, including not using or setting to “off” all built-in calibration features, such as “THX/ISF” settings and controls, setting the display area to “wide” mode to minimize distortion of the color linearity of the underlying display (e.g., RGB separation) to prevent the introduction of cross-coupling errors.
The following image shows such a problem, where the display’s internal color management causes the colors to fall back on themselves, since the internal calibration only controls the peak colors, but not the colors in the darker area.
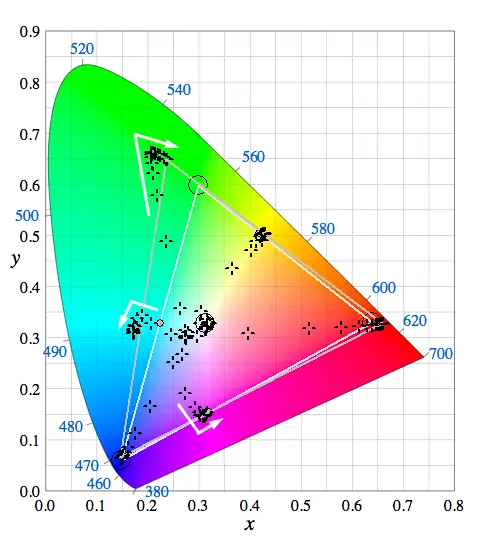
Poor internal color management of the display
The following image shows poor RGB separation due to the display’s poor internal calibration, making it nearly impossible to accurately calibrate the display.
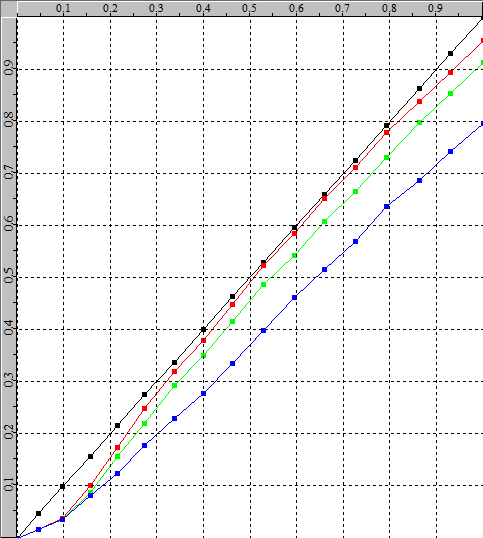
Poor RGB separation
The best initial pre-calibration for any display is to maximize the native capabilities of the screen by disabling all built-in color management features and adjusting the display’s brightness and contrast settings as needed.
If it is not possible to turn off all of a display’s internal color management, the gamut should be set as large as possible. It is impossible to increase the gamut beyond the limits produced by the display without greatly reducing the brightness of the display, and manual modification – especially color-independent adjustment of RGBCMY and saturation – can lead to problems with subsequent accurate calibration, as shown above.
Next, download the Light Illusion Calibration Images from the download page.
Make sure you know the expected image gradations and make sure the display chain is set correctly – data or TV allowed. The BarsAndBlack image helps with this.
For calibration, it may be necessary to set the output of the imaging system to convert data levels to TV levels, if TV levels are used it must be verified that all calibration patches are visible. See information below on “Data vs. TV allowable levels”.
Before starting the calibration, make sure that all dynamic contrasts or similar functions are disabled, as they will prevent any attempt to calibrate accurately.
Make sure that the display and the sensor to be used are fully warmed up before starting calibration. At least 20 minutes.
Also make sure that the display is in a dark environment, without reflections or stray light, and that it stays that way throughout the calibration process.
To start the calibration process, use the downloaded calibration images to adjust black and white using the display’s own controls. All we are interested in here is the setting of the black point (brightness control) and the white level (contrast control). If either value is set incorrectly, part of the image plane will be missing. The brightness should always be adjusted before the contrast and checked again after adjusting the contrast, because the two controls influence each other.
INITIAL DISPLAY SETUP FOR LIGHTSPACE CMS CALIBRATION
LightSpace CMS’s sophisticated calibration algorithms enable accurate calibration of any display without the need for time-consuming optimization of internal display settings – simply turn off the display’s internal color management, adjust black and white points as needed, and let LightSpace do the rest. No presetting of color temperature, gamma or gamut required, as with alternative calibration systems!
DATA VS. TV Level
Each calibration assumes that the entire layer area is visible – regardless of whether the workflow is Data or TV Level.
Therefore, it is essential that the workflow for the actual work is understood and the calibration path is set accordingly.
With most DI systems, this means understanding how to scale the image workflow as needed – for example, mapping 0-1023 to 64-940 as needed.
The need to understand this cannot be overstated, and more information can be found on the Data Level vs. TV Level page. If in doubt, ask, and if necessary, pay a consultant to check and verify everything before you perform a calibration.
If the BarsAndBalck image is cropped on the black spot and there is no “border” on the white spot (and no “step” in the color bars), you have an incorrect workflow for calibration. If the black spot looks washed out and the white spot looks gray, wrong scaling is applied, which is again wrong for calibration.
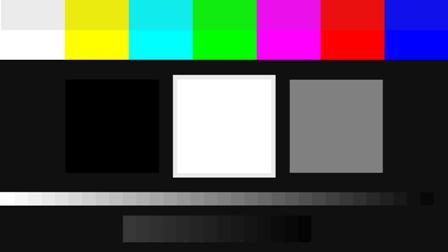
Complete data area, or newly mapped TV data area
(This is the correct setting for all calibrations).
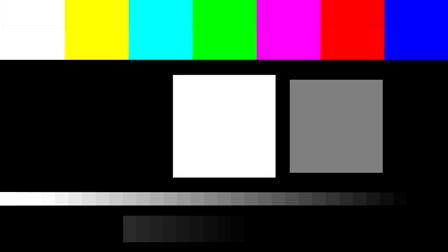
false – TV Legal Range Clipping
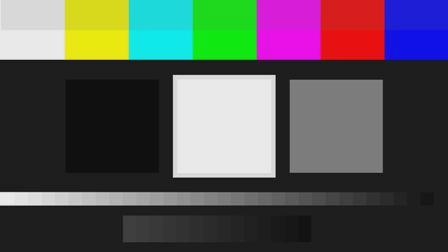
Incorrect – Incorrect scaling
black-white values
Setting accurate black and white dots (levels) is a key component to a display that shows material exactly as intended.
For most displays, the black dot is simply the minimum black that the display can show when the Brightness slider is set properly, as described below. However, some newer display technologies, such as OLED, can produce a black level that is too dark to allow accurate display of shadow detail, especially when grading. For such displays, the minimum black level should be set to the standard Grade 1 display black level of 0.03 to 0.05 nits.
If the black level is too low, this will cause the shadow details to be lifted to overcome the black levels that are too low, causing them to be lifted further when viewed on a standard TV, with black levels of 0.05 nits or higher.
The white values should be set to the default value of 100 nits, although a brighter value may be required if viewing conditions are not optimal, as with televisions in a domestic environment. However, the final white setting must prevent overdriving, as described for the contrast’ control setting below.
BACKLIGHT
Many of today’s flat panel displays have a backlight control that is independent of the brightness and contrast controls. For such displays, the Backlight control affects both black and white levels and should be adjusted to provide an accurate white point of 100 nits, with the best black level as close to 0.03 to 0.05 nits as possible.
The Brightness and Contrast controls are then used to adjust the “clipping” as defined below, which may mean that the backlight needs to be readjusted in rotation with the Brightness and Contrast controls.
BRIGHTNESS
Adjust the display brightness slider so that all the spots within the BrightnessCal image are just visible (the top left spot should be almost / just / not really visible for sure), but the background black is not lifted. The goal is to avoid image clipping or black turning to gray.
Note: The images shown here ONLY look correct on a properly calibrated display – a real chicken and egg situation!
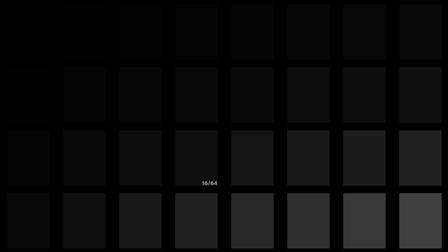
Correct – the darkest spot is “almost only” visible.
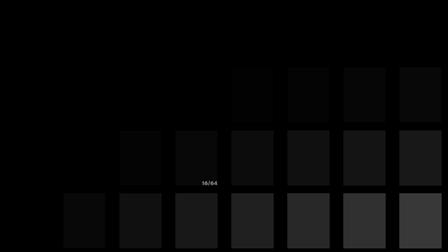
Wrong – many patches are cut off
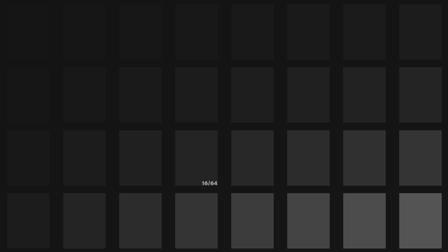
Wrong – all patches are raised way too much.
GAMMA
With the help of the “BrightnessCal” image you can also do a quick gamma check or with some displays “Black Stretch”. The separation between the individual patches should not be too obvious.
Note: Gamma is technically and more accurately checked later in the calibration process.
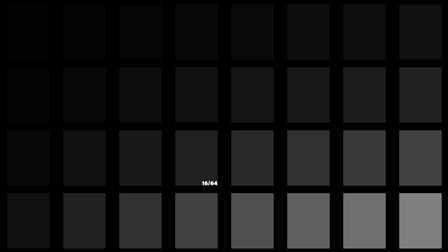
Wrong – the separation between the patches is much too large.
CONTRAST
Adjust the contrast control of the display so that all spots within the ContrastCal image are visible, while at the same time the peak white value is about 80 to 120 nits for TV monitoring and about 50 to 55 nits for motion pictures. The maximum white level must be measured with a probe and LightSpace CMS. You may have to compromise on the maximum white value to avoid clipping the white spots in the ContrastCal image.
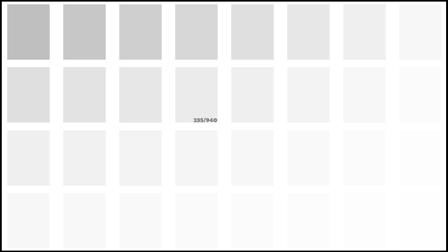
Correct – the brightest spot is “almost only” visible, without color clipping.

False – one or more of the RGB color channels are clipped (the white level must be reduced).
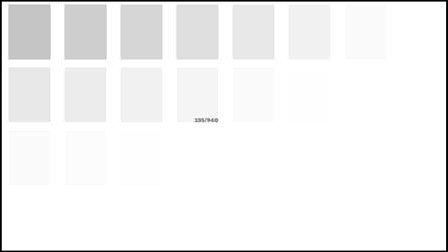
Wrong – many patches are cut off
(The white value of the entire peak must be reduced).
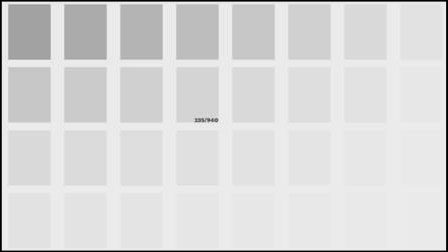
Wrong – all patches are much too visible (this can also mean a wrong gamma setting).
Note: It is rare that the contrast is too low, it is usually too much clipping that is the problem. The correct value is determined by setting the correct clipping point with the ContrastCal image and then measuring and accurately setting the actual white point BUT without clipping, so this may be a compromise for some displays.
GAMMA, GAMUT & COLOR TEMPERATURE
The next step is to check the color temperature of the display and measure the color gamut, which requires the use of a probe and the LightSpace CMS Calibration Option to make direct measurements and adjustments as needed, as well as perform a Quick Profile to see the overall color temperature, gamut, and gamma settings.
Gamma can be set as accurately as possible, although this is not really a necessary step, while Gamut must exceed the target color space, ideally to the maximum display range specified by the manufacturer.
COLOUR TEMP
The color temperature can usually be left at the display’s default setting, as this is fully corrected by the LightSpace CMS calibration LUT. However, some users may prefer to adjust this more accurately first by using the display’s available color temperature controls.
An important point is that when the color temperature is corrected via the generated calibration 3D LUT, the peak white point of the display is reduced to compensate for the color temperature difference.
On basic LCD monitors, the controls available for adjusting color temperature are usually limited – a selection of presets that are usually not that accurate – and custom RGB-independent controls that work only with gain. More professional monitors also have bias controls that affect color temperature throughout the grayscale range. When bias controls are available, they can be used to set the correct color temperature in the blacks/shadows first, and then use gain for highlights/whites. Check the low and high color temperatures cyclically.
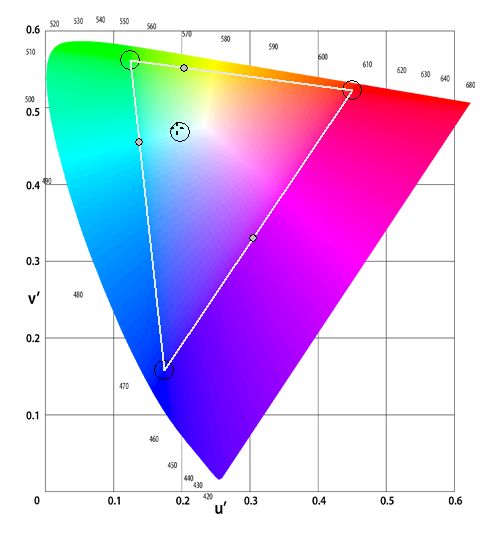
The center circle shows the target color temperature, the cross the current measured value.
Getting the monitor’s white point setting as close as possible to the desired target minimizes the amount of work required to calibrate the LUT, although as mentioned earlier, the final calibration of the LUT corrects for color temperature, so presetting the color temperature is often not necessary.
BIAS AND GAIN
The bias and gain controls of a display can be confusing, but in simple terms they work the same way as contrast and brightness, but separately for RGB. Gain controls Contrast’ and Bias of the
Brightness. This allows the color temperature of the blacks and whites to be adjusted independently and thus across the entire grayscale.
As a rule of thumb, add Bias and subtract Gain. This prevents the RGB channels from being overdriven. Also, set the bias before you set the gain, and check the bias again after you set the gain.
The reason for setting bias is that bias has a 100% effect on the black value, which is reduced throughout the gray value range to have a 0% effect on the white value, but often still has a small effect on the white value. Gain has a 100% effect on white values, reduces to 0% for black, and rarely has an effect on black values.
GAMMA
Gamma must be checked with the Quick Profile feature of LightSpace CMS using Real Profiling.
The goal is to keep the measured gamma within an acceptable range, without clipping (as should be the case with the black and white points) and with the basic controls of the display – e.g. do not use internal multi-point controls (ISF type), as the final LUT will accurately correct the gamma, and any pre-multi-point configuration will conflict and ‘fight’ with the 3D LUT calibration.
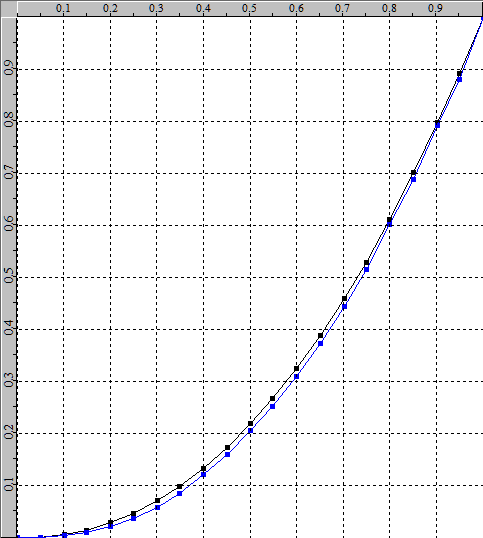
An example of a sufficiently accurate gamma representation
COLOUR GAMUT
The color gamut (saturation) should be set to be larger than the target range, ideally the maximum that the display can produce – looking at the image below, the point is to have the crosses beyond the circles, with the measured gamut triangle larger than that of the target…. which is the case here, although blue is just outside (larger than) the desired range.
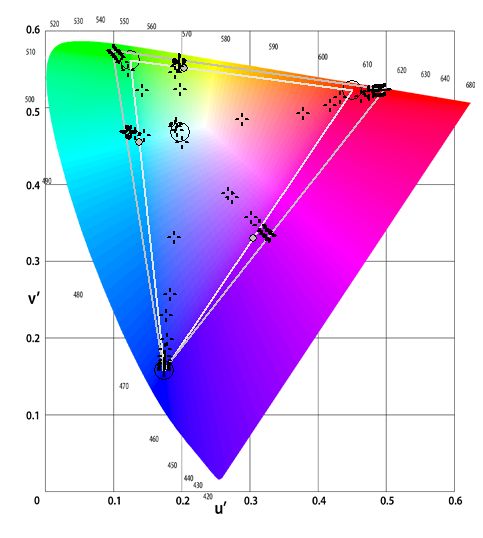
Near perfect pre-calibration gamut plot
If the gamut can be controlled, the display range must not be reduced below the target, as the subsequent calibration LUT will not be able to increase the gamut again. Calibration LUTs can only work by subtracting the colors, so the preferred approach is to set the display to the maximum native color space.
CHECK SETTINGS AGAIN
Before finalizing the manual settings, check everything again, as later adjustments may have changed the previous settings.
Carry out the complete characterization and the creation of the LUT.
When manual calibration is complete, run a full display profile and then create a final calibration LUT….
Note: If the display shows good RGB separation and reasonable RGB balance (white point), a quick profile can be used to generate a 3D calibration LUT. If the display’s RGB separation is poor and has poor RGB balance, a full display characterization profile (cube-shaped profile that provides full volumetric color information) will likely be needed for accurate calibration LUT generation.
For more information on exact calibration techniques, see the page Using measuring heads for display profiling. Pay special attention to the section What cannot be corrected!
Quelle: https://www.lightillusion.com/display_calibration.html

